

Sport C Racing Mirage TomCat Restoration
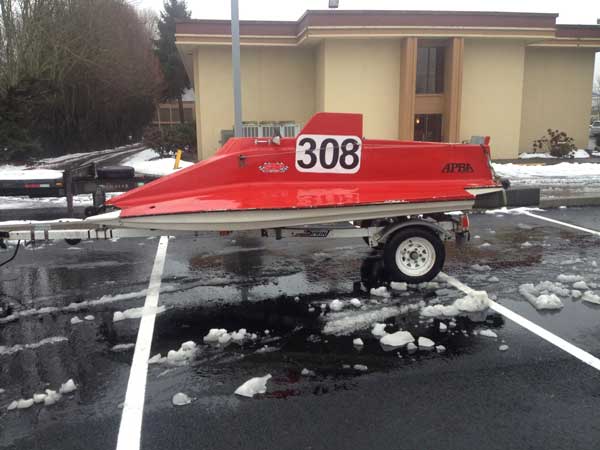
Here is a customers (competitors) Mirage Tomcat. These are very popular on the West Coast and are a competitive boat. This particular boat is supported by an array of sponsors, who will be revealed once final painting is complete... In the meantime here's a few pics of our repairs in progress.
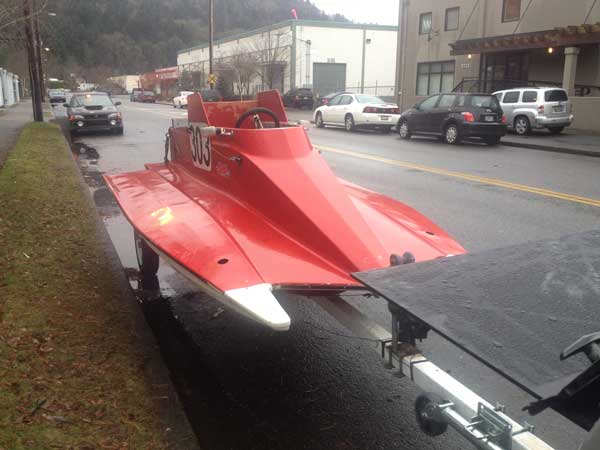
The Tomcat #303 as it arrived at our shop.
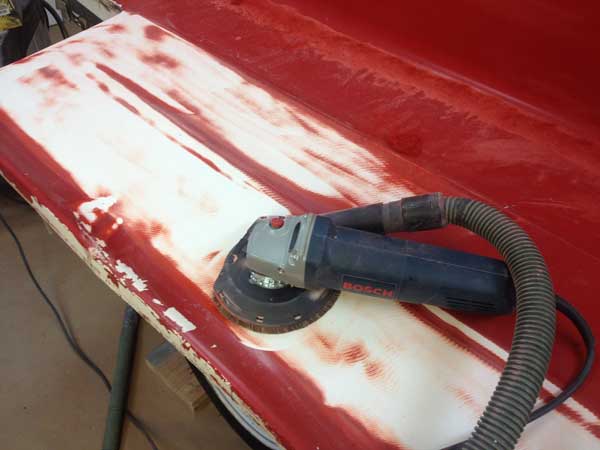
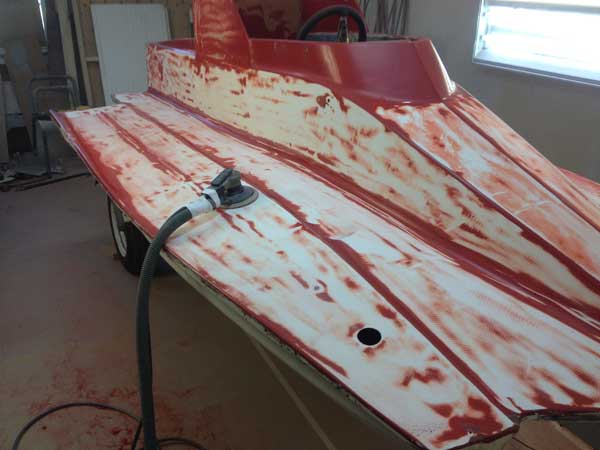
Removing the 2 layers of 1 part paint. Single component coatings are easy to apply and have good seasonal performance, but also only retain good gloss and appearance for a few years. Single component coatings are also forgiving and easy to apply. However, they are also relatively soft. They tend to plug sand paper quickly. We removed a majority of the red paints from #303 using a grinder with medium (~60g) abrasive disc on a 5" vacuum grinder. Though it doesn't catch all of the dust, the vacuum attachment for the grinder does significantly reduce the amount of fine particules floating around in the air. In this case we have one of our Festoon vacuums tied to a Bosch 5" grinder.
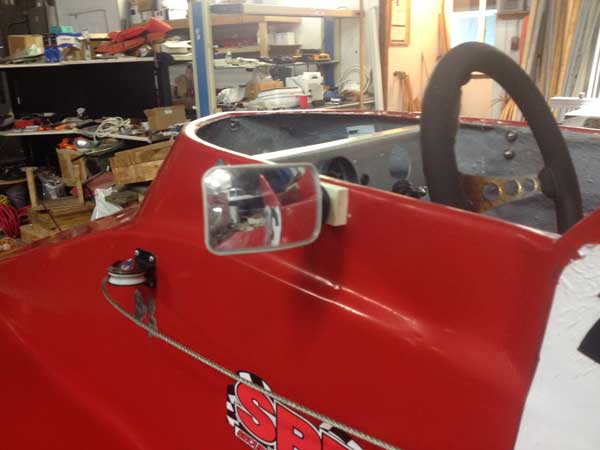
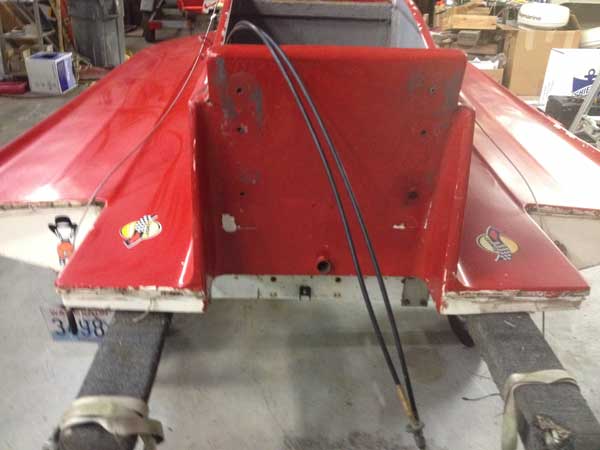
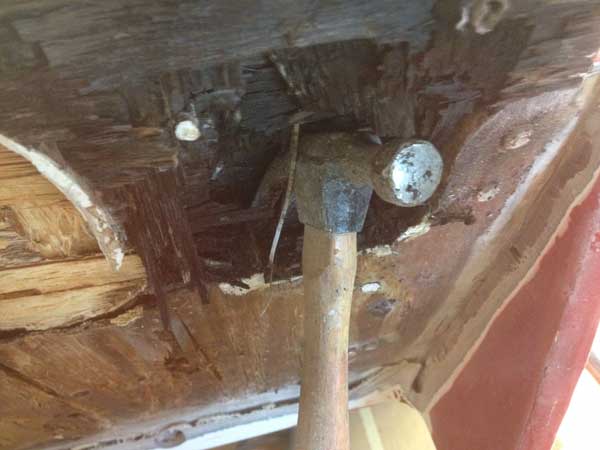
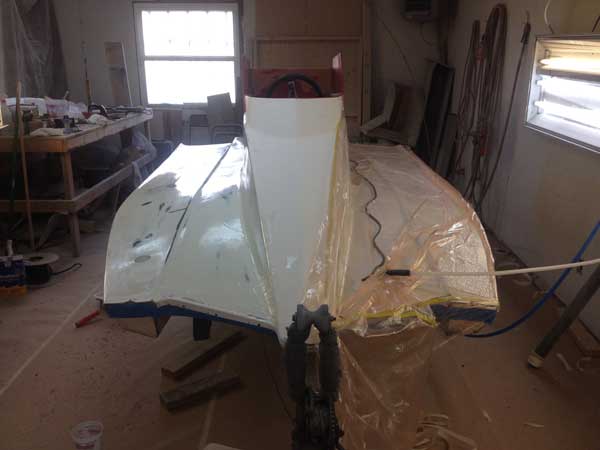
As is common on many aging boats, the transom was not in good shape. Due to regular equipment and hardware changes race boats also have the tendancy to be drilled and fastened regularly, often without sealant applied to the fasteners. Forensic dismantling showed this particular boat had the transom cut down in height at some point, probably for a short midshection racing outboard. Then it was extended, but had an oval hole cut in it for OMC style power trim (see the SilverWing which has OMC trim). Later on the OMC cutout was filled with plywood and glassed over, and a modern style Sierra power trim setup was installed. Fasteners we removed from the jack plate and hardware also didn't all include sealant. As a side note we also see plenty of runabouts, ski, and fishing boats of similar age with similar issues around stern drives, outboard mounts, depth transducers, and the like. Also note the setback on this transom. The side sponsons end several inches forward of the boat's center transom. This effectively moves the outboard farther aft compared to the boat's hydrodynamic running surfaces, which increases the affects of engine trim on boat trim (longer lever arm creates greater trim moment). The hammer claw was really a prop, fingers were all it took to remove most of the soft transom plywood.
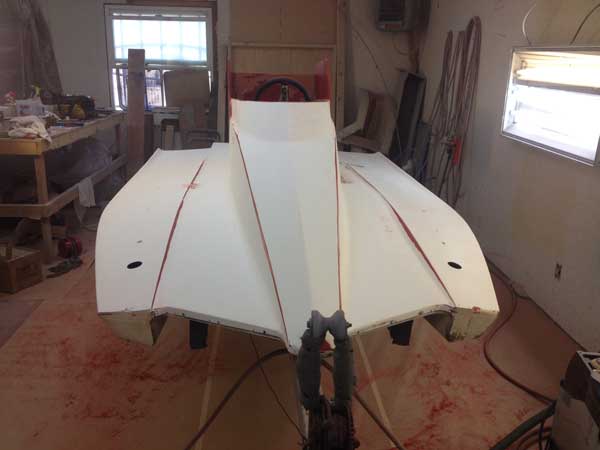
I didn't get any good pics of it, but the side decks had an assortment of stress cracks above frames. There were also a couple of places the thin (approx 3 layers of cloth) fiberglass was full fractured. The hull to deck joint separated relatively easily which allowed access to fiberglass repairs underneath the deck. As much gelcoat and paint was stripped from the deck tops as practical. Fractured areas were then ground down to bare glass (glassing to gelcoat is not as good of an adhesion for the repair as getting down to bare fiberglass). After addressing the repair areas, we overlayed the entire decks with a very light layer of cloth and epoxy. All was consolidated under a vacuum bag to keep weight to the bare minimum and ensure the cloth overlay was well conformed to the deck shapes (no voids or areas unnessarily retaining resin). After peeling off the vacuum bagging consumables (peel ply, breather, bag) the cloth texture was filled with resin as needed.
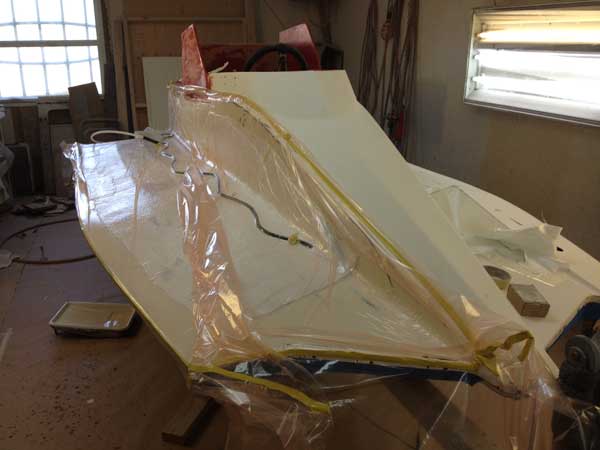
After the deck cloth overlay next step was Awlgrip primers. We used a blend of both Awlgrip 545, and Awlgrip Ultra Build Epoxy Primer to blend in repair areas. There were a few areas where a light application of fairing compound was also necessary. Overall the Tomcat's decks are very light and flexible compared to the Wing. The Tomcat side decks were laid up originally with approximately 3 layers of glass only. The Silverwing apeared to be built of 2 layers of cloth, followed by a layer of 2mm Coremat, finished with 1 layer of cloth on the inside. This also means it is not realistic to fair the decks to the same smooth effect as the wing without adding excess weight, or ending up with too much fairing compound which will likely crack and flake off with flexing over time. The side decks won't have the same clean reflection in the paint image when finished, but then will still be light and fast on the race course (depending on setup, prop, motor, and driver of course).
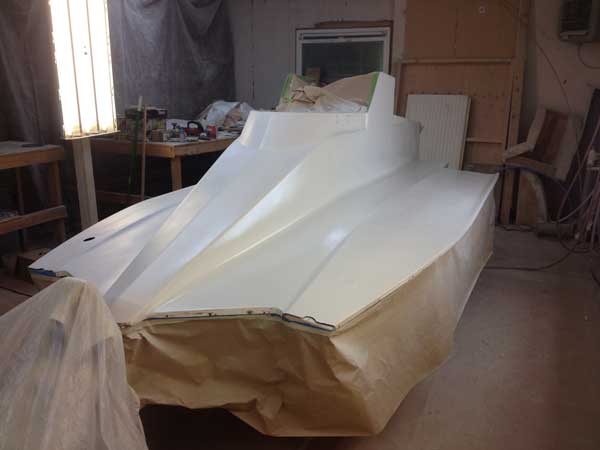
The new transom is going in right now, pics will be posted shortly. The next step is re-bonding the hull to deck joint. Then comes a bit of fairing and cleanup around the fresh transom, final primer, and paint.